Sunday 26 September 2010

Bara brith (Speckled bread)


When I saw this lovely loaf cake on
Sam’s blog
I knew I had to make it. The recipe comes from the North Wales Tourism website so it must be authentic; I stress that because I thought Bara brith always contained yeast and this, clearly, doesn’t.


I can’t ever think about Wales now without “
Gavin and Stacey” coming to mind.
It is one of my favourite comedies of recent times and I was trying to think how the Welsh characters would describe this cake. Stacey would definitely call it “lush” whereas my favourite character, Nessa, would probably go for a more measured, “tidy”.


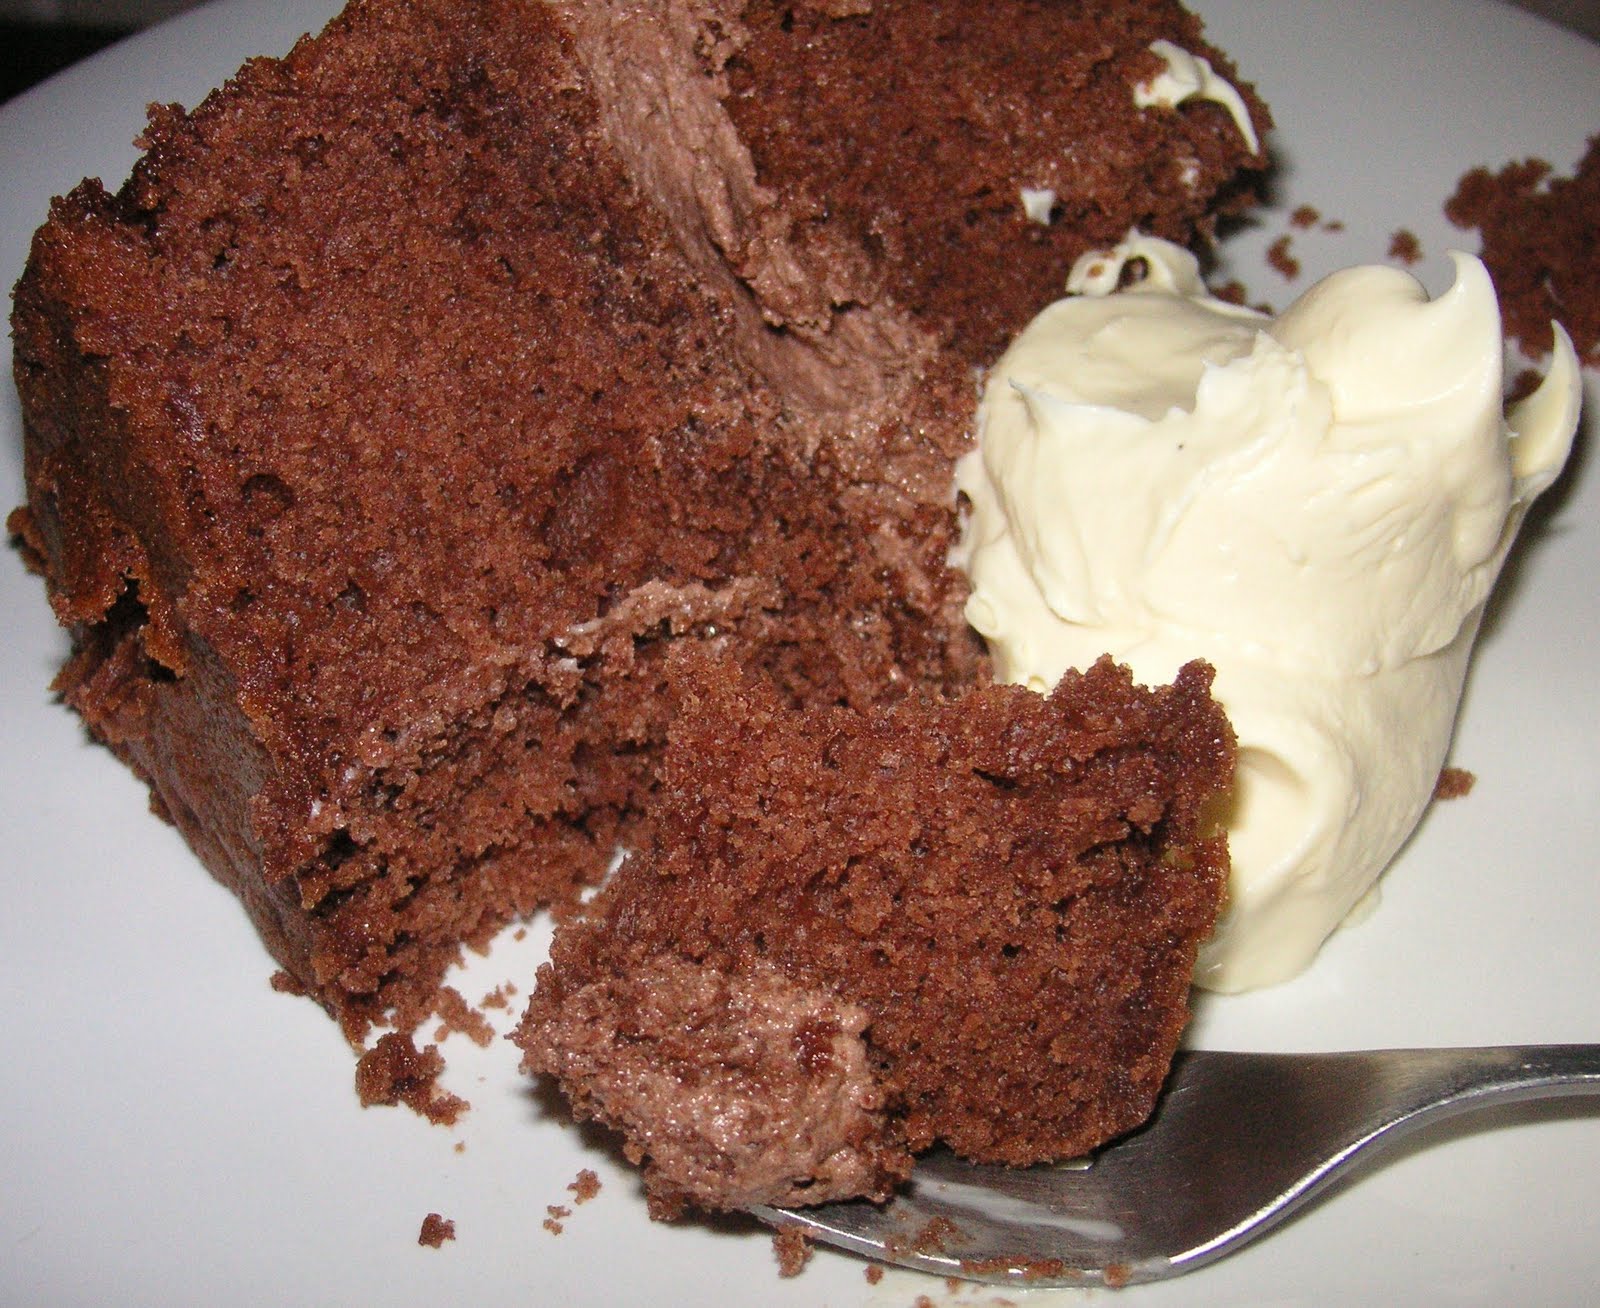
There’s something enticing and comforting about a fruity slice of cake spread with creamy, rich, yellow butter.
As to how much butter – a friend of mine described this perfectly when she said “butter must be thick enough so you can leave teeth marks in it”. I couldn’t put it any better:


The most fun part of this recipe is soaking the fruit.
Whether in tea (as for this recipe) or spirits (Christmas cake) I can never resist peeking in the pot to see how much of the liquid has been absorbed. The fruit turns glossy and plump – it’s practically botox for dried fruit!


I think there’s no point blogging if you’re not going to be honest and, the whole time I was baking this cake, I truly believed it would end up in the bin.
So much so that as soon as it came out of the oven I started to bake a back-up cake! My first mistake was doubling the quantities to make two loaves – have you tried mixing that much fruit into a tiny amount of cake? Let’s just say that I now feel fully prepared to enter the next arm wrestling contest I come across. My second concern was that the mix was so dry; I added some milk until it at least started to look like a cake mix although milk was not included in the source recipe.

When the loaves came out of the oven they looked nobbly, hard and dry so I thought I should cut a slice to see what the inside was like.
At this point they were still definitely heading for the bin. The cut slice started to comfort me – the crust which formed during baking was just a crust and the inside was moist and fruity. I tasted it and was underwhelmed. Still heading for the bin. But something made me butter it and try it how it is meant to be eaten. Please now imagine the Hallelujah chorus playing at full volume in my kitchen because it was delicious! It so needs the butter (salted) to bring all the flavour and texture alive. It’s heavenly!


Ingredients

450g mixed dried fruit – I used a mix of sultanas, raisins, currants, and blueberries
300ml tea – make as usual but don’t add the milk!
2 tablespoons marmalade
1 egg
6 tablespoons soft brown sugar
1 teaspoon mixed spice – I put a little extra as I like it spicy!
450g self raising flour
Milk as necessary

To glaze: honey

Salted butter to serve


Method

Start by soaking the fruit for 24 hours. Place all the fruit in a bowl and cover with the tea. Stir when you happen to walk past!

Preheat the oven to 170˚C/fan oven 150˚C/325˚F/Gas mark 3

Line a 900g loaf tin with baking paper – this will help you to get the loaf out of the tin.

Mix the marmalade, egg, sugar, spice and flour into the bowl containing the fruit and tea.

Spoon into the loaf tin and level the surface.

Bake for approximately 1 hour and 45 minutes or until a skewer, inserted into the centre of the loaf, comes out clean. After about an hour of baking check that the loaf isn’t browning too much – if it is, either move it down a shelf in the oven or loosely cover the top with foil.

Leave to stand in the tin on a wire rack for 10 minutes then turn out onto the wire rack.

Use a pastry brush to cover the top of the loaf with honey. As the loaf is so warm, the honey will melt and become easy to work with.

The cake will keep for several days in an airtight tin.

Serve in slices, thickly buttered.

Bask in the glory of the wonderful thing you have created.

Eat.

Sunday 19 September 2010

Blackberry panna cotta birthday cake


Since he saw me make it for the CCM back in May, my nephew (The Boy Wonder) had only one request for his birthday cake – a
panna cotta filled sponge … but with a twist; the panna cotta had to be blackberry.


The
recipe and method is the same as the cake I made in May but with added blackberries (200g punnet of blackberries pureed and sieved, then heated until reduced by half to make a thick syrup with intense flavour; add sugar to taste – I added 2 tablespoons). I made the panna cotta as usual then added the blackberry syrup just after whisking in the gelatine.


The idea with this cake is that you carve out the sponge to make a bowl and then fill it with panna cotta – it’s simpler than it sounds (as you will see if you click on the link to the method, given above).
From the outside, the cake doesn't look all that, but I think this photo gives you a visual idea of the magic within:


Now you might be thinking that this would be a nightmare to cut but – surprisingly – it isn’t and you can get beautifully crisp slices:


The colour of the panna cotta was a delicate lilac and the fruitiness worked very well.
At first I thought I hadn’t added enough fruit to the panna cotta as the initial taste was creamy and rich; then the fruit came through and was unmistakable. I’ve tried to capture how the sponge turned lilac as it soaked up the panna cotta before it set:


Happy birthday Boy Wonder!


Greek yoghurt cake with rum


I do love a yoghurt cake; it’s something to do with the lightness of texture and the rich tang to the finished sponge’s flavour. This is a simple cake (in method and in look) but it packs lots of flavour.


Total Yoghurt very kindly donated a selection of their yoghurts for me to bake with, well, I say “a selection” but in truth their generosity virtually filled a whole shelf in my fridge!


If you don’t like rum you can omit it from the cake or replace it with any spirit, or indeed other flavour, that you wish. I used extremely dark overproof rum as I love the syrupy kick it packs.


This isn’t a crumbly cake in the Victoria sponge genre; it’s a really moist, springy sponge – I reckon it would keep for days...I’m surmising here because, as usual, mine didn’t hang around that long!


A random thought that has occurred to me whilst writing this blog post: “Yoghurt” is one of those words that the more you type it or say it, the less it feels like a real word. I hope it is a real word – I’ve lost all sense of judgement on the matter!

A second random thought is that neither pronunciation of the word makes it sound any better. I’m definitely in the “yoggert” school and feel myself flinching every time I encounter a “yo-gert” eater! Whether you’re reading this as Yoggert cake or Yo-gert cake, I hope you enjoy it!

Ingredients

For the cake:
250g Greek yoghurt – I used Total 2%
200g caster sugar
2 eggs
1 teaspoon vanilla extract
80ml vegetable oil
1 tablespoon dark rum – I used Gosling’s Black Seal 151 proof
240g plain flour flour
1 ½ teaspoons baking powder
1 teaspoon bicarbonate of soda

For the icing:
115g /4oz icing sugar – I used golden icing sugar
½ tablespoon dark rum
1 tablespoon water – add more if required


Method

Preheat the oven to 180C/fan oven 160C/350F/Gas 4.

Line a 20cm springform round cake tin with baking paper.

Whisk together the yoghurt and the sugar.

Beat in the eggs, one at a time.

Beat in the vanilla, oil and rum.

Weigh out the flour and add the baking powder and bicarbonate of soda to it.

Sift into the yoghurt batter and mix until just combined.

Pour into the prepared tin and level the surface.

Bake for 35-40 minutes or until a skewer inserted into the centre of the cake comes out clean.

Leave to cool on a wire rack until you can safely handle and turn out the cake.

Leave to cool completely on the wire rack.

Now make the icing: Beat together the icing sugar and orange juice until smooth and glossy.

Pour over the cool cake and smooth, before leaving to set.

Bask in the glory of the wonderful thing you have created.

Eat.

Sunday 12 September 2010

History corner – Buttermilk currant cake


This recipe comes courtesy of “The Currant Recipe Book”, published in 1945 by the wonderfully named Central Currant Office (London).
This makes me hope that there were regional Currant Offices scattered far and wide. There is little (practically none) online information about this organisation and I have so many unanswered questions: Was the Central Currant Office arch enemy of the Central Sultana Office and the Central Raisin Office? What happened to the CCO? Who is promoting currants now? Have currant sales fallen since there is no London office marketing them?


How can you fail to love a book where the introduction is titled “In praise of currants” and written by someone called Sir W. Arbuthnot Lane, President of the New Health Society? (His
Wikipedia write up is fascinating, showing him to be an admirably free thinker and some 40 years ahead of his time with his views on diet and digestive health). He notes that, because of the roughage they supply, currants are a “useful ‘regulating’ food”…..I think we all know what that means!


The CCO should actually have been named the Currant Propaganda Office for there are assertions made throughout the booklet; they form the headers and footers for each page and are presented as unquestionable facts.
While some are probably true or harmless enough, it does make you realise how unregulated food health claims were until fairly recently. Here are some of my favourites:

  • Eat more currants and forget “nerves”
  • Eat currants and work better
  • Currant bread tempts the appetite
  • Currants bring good health
  • Currants keep you fit
  • Children love currants – because they need them
  • Spare the currants and you spoil the cake
  • Currants make food tempting
  • You never get tired of currant bread
  • Currants give radiant vitality


My chosen recipe appears under the banner “currants correct acidity”.
At this point I was under such pro-currant enchantment that I’d have believed anything. This cake has lots of buttermilk, more buttermilk than I’ve ever seen in a recipe, but no eggs. It means that the cake is pale and you should test it’s ‘done-ness’ with a skewer rather than relying on it being golden.


The resulting cake was fruity with a hint of spice; it tasted very much like a good rock bun but with a light, soft, spongy texture.
Very pleasant indeed and a lovely tea time cake. It wasn’t as heavy as a full-on fruit cake, such as a Christmas cake, but had more oomph to it than a sponge. As to whether it improves ‘regulation’....I’ll keep you posted!


Ingredients

340g (3/4lb) plain flour
115g (1/4lb) unsalted butter
115g (1/4lb) caster sugar
170g (6oz) currants
Pinch of spice – I took this to mean mixed spice.
I added a teaspoon.
¾ teaspoon bicarbonate of soda
¾ teaspoon cream of tartar
440ml (3 gills) buttermilk

Optional (not in original recipe): 2 tablespoons Demerara to sprinkle on top of cake


Method

Preheat the oven to 170˚C/Fan oven 150˚C/325˚F/Gas Mark 3. The recipe says that the cake should be baked in a “steady oven” and I have interpreted it to mean these temperatures, based on other curranty/raisin cakes I’ve baked.

Line a 23cm round springform tin with baking paper. I played safe with tin size – you could get away with a 20cm tin but make sure that the baking paper comes up a good 2cm above the height of the tin.

Sieve the flour into a bowl and rub in the butter until the mixture resembles breadcrumbs. If you prefer, you can do this in a food processor.

Stir in the sugar, currants, spice and cream of tartar.

Dissolve the bicarbonate of soda in a little of the buttermilk then add to the mix, stirring well.

Stir in the remaining buttermilk.

Turn the mixture into the prepared tin and level the surface.

If using, sprinkle the Demerara over the top of the batter.

Bake for approximately 1 hour 10 minutes or until a skewer inserted into the middle of the cake comes out clean.

Stand the cake, in its tin, on a wire rack until the tin is cool enough to safely handle and remove.

Leave the cake to cool completely on the wire rack.

Bask in the glory of the wonderful thing you have made.

Eat.

Sunday 5 September 2010

Chocolate sponge cake with chocolate buttercream

I asked Mr CC whether he had any cake preferences for this weekend; his “chocolate cake” response was so rapid that I was left pondering whether he prepares an answer in advance, just in case the question is asked of him, or whether his answer would always be the same!


This is a classic chocolate sponge sandwich with a classic chocolate buttercream filling.
You could jazz it up with a Ganache topping, or a whipped cream and fruit filling, but I’ve gone for simplicity this week.


What I liked about this cake was that it was chocolaty but not overly rich; sometimes chocolate cakes head more into the dessert/truffle territory, which is lovely, but not what I was aiming for.
The sponge was light and soft but satisfyingly sticky too – definitely a tea time cake! If (like me) you sometimes find yourself eating a ‘grown up’ chocolate cake, fighting back grimaces at the bitterness and trying to kid yourself that you’re really enjoying the strong cocoa content chocolate, this may be the cake for you!


Not sure really why these sponges turned out to be such whoppers!
You’ll see from the ingredients that the volumes are fairly standard for a sponge sandwich. The sponges just rose, and rose, and rose. While they’re lovely light sponges the cake did look huge when stacked!


This post marks my blog’s third birthday!
Where has the time gone? It seems only yesterday that my friend Soo helped me take the first tentative steps into blog land (thanks Soo!) and I clearly remember the excitement when my daily hits got into double figures!


Google analytics provides constant entertainment with its detailed stats about my blog…well, I am an accountant…what do you expect!
Most of all I love the country analysis; I’ve never been able to get over the wonder of me baking a cake in my kitchen and then someone in Rwanda reading about it – I think we sometimes forget the awesomeness of the web.

Since my blog started back in September 2007 there are four countries whose readers average over 10 minutes per visit to my site; these aren’t single visit blips either. I think if I gave you all year to guess you wouldn’t get them! They are….

….in 4th place, with an average visit time of 10 mins 2 secs – Suriname….

….in 3rd place, with an average visit time of 10 mins 31 secs – French Polynesia…

…in 2nd place, with an average visit time of 11 mins 23 secs – the Marshall Islands…and….

….in 1st place, with a whopping average visit time of 14 mins 23 secs – drum roll please – Dominica!

A big hello to all my far-flung exotic readers!

The three most popular recipes on my site don’t seem to change – well, the top two don’t. It pleases me that they are classics with lovely flavours. In order of popularity they are:

1. Cherry Bakewells

2.Dark Jamaican ginger cake

3.Madeira cake

I’ll stop there before I bore you all to death with blog stats…I fear these might be like baby stories i.e. fascinating to the parents and dull as ditchwater to everyone else!

Here’s to the next year and the cakes I am yet to meet (i.e. eat)!


Ingredients

For the cake:

225g unsalted butter, at room temperature
225g caster sugar
4 eggs
225g self raising flour
3 tablespoons cocoa powder
150ml milk

For the buttercream:

85g unsalted butter, at room temperature
170g icing sugar
2 tablespoons cocoa powder
1 tablespoon boiling water

Method

Preheat the oven to 160˚C/fan oven 140˚C/320˚F/Gas mark 3.

Line the bottoms and sides of two 20cm loose bottomed sandwich tins with baking paper.

Start by making the cakes: place the butter and sugar in a bowl and beat until pale, soft and fluffy. Don’t skimp on this stage as it’s the key to a light sponge.

Gradually beat in the eggs. If the mixture starts to curdle, beat in some of the flour.

Stir in the flour, cocoa powder and milk.

Spoon the batter into the prepared tins and level the surface.

Bake for approximately 50 minutes or until a skewer inserted into the cake comes out clean. Mine took exactly 50 minutes.

Leave to cool in the tins on a wire rack.

When cool enough to handle, remove the sponges from the tin and leave to cool completely on the wire rack.

The sponges can be made a day in advance and stored in an airtight container overnight.

To make the buttercream: beat the butter until it is soft.

Sift the icing sugar over the butter along with the cocoa powder and water and beat until smooth, soft and well combined. The more you beat, the lighter and more whipped the buttercream will taste.

Place one of the sponges – flat side up – on the serving plate and spread the buttercream over it.

Place the remaining sponge – flat side down – onto the buttercreamed sponge.

If required, dust icing sugar over the top, but I never bother with this!

Bask in the glory of the wonderful thing you have created.

Eat.